Formal
Algorithm
Common
Docker
Javascript
Network
Node
Notes
c++
c++Lib
golang
Javascript
Webpack
Vite
Webassembly
MCU
Protocol
ML
Compilation
DataStructure
Algorithm
MC_MP_Programming
ResearchMethod
PrivacySecurity
EfficientAlgorithm
AdvancedAlgorithmicTech
AlgorithmGameTheory
LowCodeProject
ComputerCompose
Network
LinearMath
OperationSystem
Mathmatic
Introduction of Svelte
Svelte 是一个在 web 中构建用户界面的框架。它使用编译器并使用 HTML,CSS 和 Javascript 来编写声明式组件.
Svelte is a framework for building user interfaces on the web. It uses a compiler to turn declarative components written in HTML, CSS and JavaScript…
.svelte后缀的文件是用于构建 Svelte 应用的组件。与.vue文件类似,.svelte文件包括三部分:HTML, style, script, 其中 style 和 script 是可选的。
// .svelte file

<script module lang="ts">
    // Script module
</script>

<script lang="ts">
    // Script logic
</script>

<style>
    // Style
</style>
Rune(s)
Runes 是一个用于在**.svelte**文件中控制 Svelte 编译器的一种特殊符号。
let message = $state("hello");
$state
与 React 的 state 相似,$state 允许我们创建一个响应状态,让 UI 可以动态地响应数据变化。
如果声明的stste是一个数组或对象,state 则会返回一个proxy对象
{ obj.test }
// 1

我们也可以使用class关键字来使用$state
{test.text} {test.num}
$state.raw
如果我们不想在 Array 或 Object 中深度监听数据变化,我们可以用$state.raw方法声明变量。
{test.text}
这种方法可以提高在大型数组和对象中的性能,避免在这样的数据中进行过度的监听。
$state.snapshot
在$state进行深度监听数据时,返回的是一个Proxy对象,如果我们想获取在某一个时间片段中获取该Proxy对象的静态数据,需要用到$state.snapshot方法。
$derived
类似于 Vue 的computed和 React 的useMemo, $derived可以监听已有的 state 变化而返回经过开发者处理后的数据,例如
{num} {multiple}
$derived.by
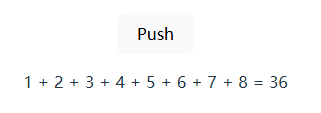
$derived 可以捕捉到一些基本的数据类型的变化并返回,如果要进行复杂的数据处理,需要用到$derived.by方法
{ arr.join(" + ") } = {total}
$effect
$effect 函数会追踪那些state和derived发生变化,然后重新执行对应的函数。(类似于 React 中的副作用函数 useEffect)
大多数effects都用于通过 Svelte 本身创建,例如 <h1>{ title }</h1>, 当 title 发生变化时,Svelte 内置的 effect 函数则会调用。
同时,我们也可以通过$effect来自定义 effect 函数。
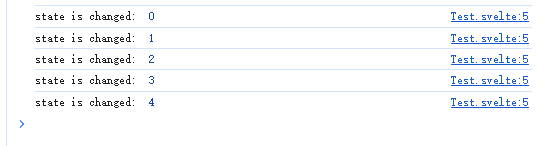
可以看到当点击按钮 state 发生变化后,先前声明的 effect 函数会进行调用。
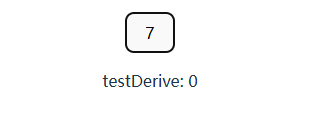
需要注意的是,$effect 中只能监听函数内同步读取的依赖,异步读取的数据不会被追踪,例如 await 和 setTimeout 中的数据
testDerive: {testDerive}
- $effect.pre
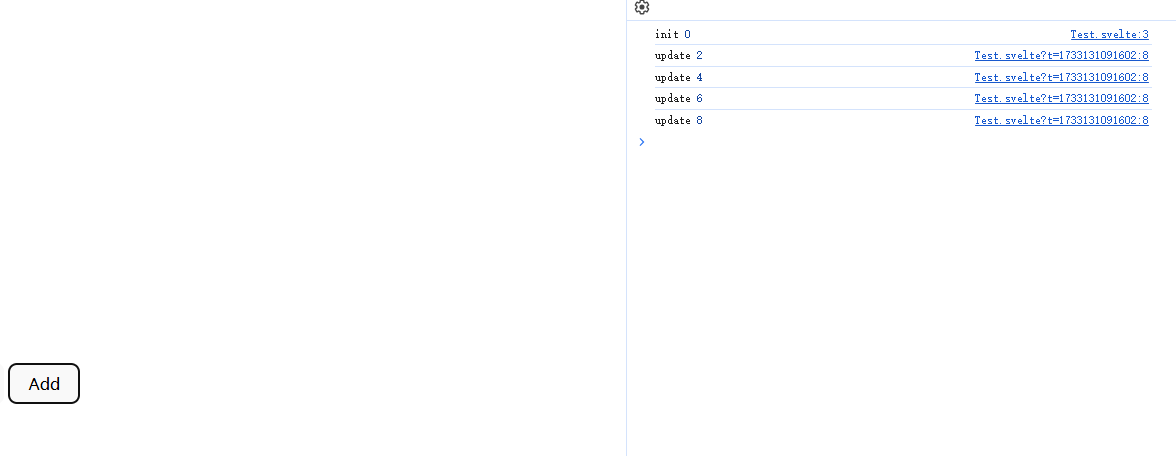
顾名思义,$effect.pre会在 DOM 更新之前调用该 effect 函数。
- $effect.tracking
方法会返回一个布尔值, 用于查看当前组件是否存在追踪上下文
in template: {$effect.tracking()}
- $effect.root
改方法会创建一个非追踪并且不会被自动清除的作用域,适用于手动控制内嵌effect函数,For example:
$props
- 与
Vue和React类似,$props 用于获取传入组件的参数
This is a props: { test }
$bindable
从$props中传入的数据,通常是从父组件到子组件单向的数据流。如果我们想创建一个从子组件往上流动的数据,则需要使用$bindable.
{label}
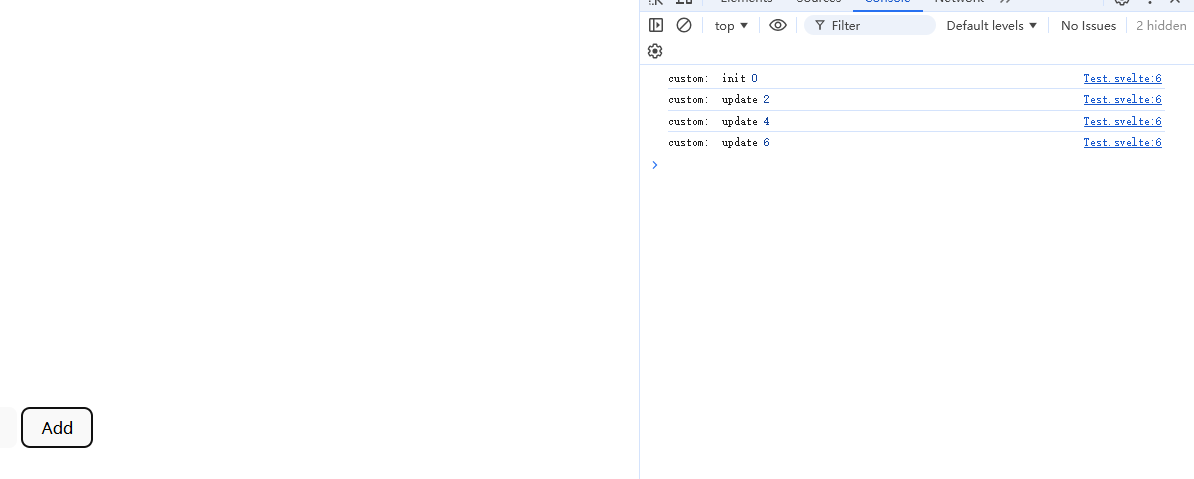
$inspect 和 $inspect(…).with
-
⚠ 该方法仅在开发时使用
-
主要用于打印$state和$derived数据的变化,作用是当监听的数据发生变化时,将数据打印到控制台。
$inspect(...).with则是用于自定义debug的方法
$host
- 该rune为子组件提供了一个可以访问宿主元素并调度自定义事件
count -= 1}
onincrement={() => count += 1}
>
count: {count}
需要注意的是:
-
要使用customElement需要在编译配置中加上
customElement:true -
子组件中的customElement命名必须带有
-,例如my-test,my-example
// vite.config.ts
export default defineConfig({
  plugins: [svelte({
    compilerOptions: {
      customElement: true
    }
  })],
})
Template 表达式
Template 表达式主要用于在.svelte文件中编写动态的HTML。
条件表达式 {#if …}
- 用于控制HTML元素的显示和隐藏
{#if isShow}
Show
{/if}
{#else}
Hide
{/else}

从Dom结构中可以看到,条件表达式控制是直接改变Dom结构的,并不是简单的display: none隐藏。
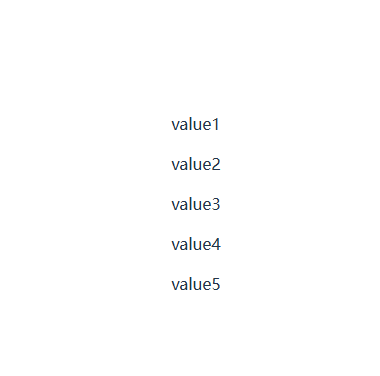
遍历表达式 {#each …}
用于遍历数据,对象,Set和Mac并生成相应的HTML结构
- {#each expression as [itemName, index] (key)}…{/each}
{#each list as item (item.key)}
{item.value}
{/each}
{#key …}
{#key}的作用时:当Key值改变时,表达式中的内容会销毁并重新创建。如果表达式中内容为组件, 则组件会被重新实例化
{#key num}
{num}
{/key}
{#await …}
-
用于处理Promise异步执行的三个状态
-
表达式:{#await expression}…{:then name}…{:catch name}…{/await}
{#await promise}
Loading...
{:then value}
Result: {value}
{:catch err}
Error: {err}
{/await}
-
也可以使用以下表达式
-
{#await expression then name} … {/await}
-
{#await expression catch name} … {/await}
-
片段 {#snippet}
#snippet 提供了一个可以在HTML中创建代码片段的方法。
- 用法:
{#snippet name([param1, param2, ... , paramN])}
例如有一个循环生成的HTML组件:
{#each list as item, index (item.key)}
{#if index % 2 === 0}
Even: {item.value}
{:else}
Odd: {item.value}
{/if}
{/each}
利用snippet可以将循环体内的代码抽离出来:
{#snippet ItemSnip(value: string, index: number)}
{#if index % 2 === 0}
Even: {value}
{:else}
Odd: {value}
{/if}
{/snippet}
{#each list as item, index (item.key)}
{@render ItemSnip(item.value, index)}
{/each}
其中,@render表达式用于渲染输入的snippet组件,下面会介绍该表达式。
将HTML代码抽离成片段,这也意味着,我们可以导出和传入代码片段
导出snippet:
{#snippet Test(a: number, b: number)}
{a * b}
{/snippet}
导入snippet:
{@render Test(1, 2)}
{@render}
在snippet中已经初步介绍了**@render**, 他的唯一作用是用于渲染snippet
- 表达式 {@render …}
{@html}
- 用于注入html,表达式 {@html content}
{@html content}
{@const …}
- 用于定义常量,表达式 {@const x = y}
{@debug … }
- 类似于
console.log,用于在控制台中打印指定数据
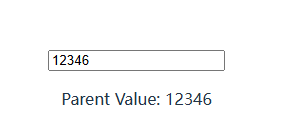
bind
与vue类似,bind表达式用于改变数据流动的方式。通常来说数据流动时单向的,从父节点到子节点。通过bind表达式,我们可以实现数据从子节点流向父节点。例如:
具体可用的bind:value的场景,可以参考官网
除此之外,bind还可以与$bindable结合用在父子组件的传参当中。
Parent Value: {parentVal}
use
use:xxx可以指定一个Action在一个组件渲染之后执行。
{text}
过渡动画
svelte还提供了一些表达式来使HTML元素拥有简单的过度动画:
transition, 配合svelte/transition库使用,可以让HTML Element在显示/隐藏时加入动画。
{#if isShow}
Hello World
{/if}
in和out用于分别控制显示/隐藏的动画
{#if isShow}
Hello World
{/if}
animate
特殊元素
svelte提供了一些特殊的元素来处理特定的情况, 例如处理一些边界情况,绑定window事件等
<svelte:boundary>
<svelte:boundary> 允许我们处理一些错误的边界情况,防止整个程序崩溃。
Oops, Something went wrong.
{#if resetFunc !== null}
{/if}
<svelte:window>
该标签允许开发者在window中添加各种事件,例如: onscroll, onkeydown, onclick,该标签只能定义一个。
<svelte:document>, <svelte:body> 和 <svelte:head>
同理,<svelte:document>, \<svelte:body\> 允许开发者在对应的中添加各种事件,例如visibilitychange, 与<svelte:window>相同,这些标签在项目中只能定义一个。
document可添加事件:
-
activeElement
-
fullscreenElement
-
pointerLockElement
-
visibilityState
其中,<svelte:head> 用于定于网页header信息,例如title, description等
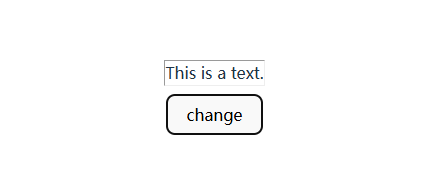
<svelte:element>
<svelte:element>用于渲染开发者在不同场景下不确定的HTML标签,例如
This is a text.

<svelte:option>
<svelte:option>提供一个位置来改变每个组件的配置,例如是否允许runes, 定于当前组件的namespace和customElement等。
具体可能的option有:
-
<svelte:option runes={true}>, 是否允许当前组件使用runes -
<svelte:option namespace="test"> -
<svelte:option customElement="my-element"> -
<svelte:option css="inject">, 启用改选项会将所有css以内联的方式写入
Runtime
Store
Svelte中集成了一个Store对象,用于将声明的动态数据在跨组件之间传输。(与Vuex, Pinia, Redux类似)
-
完整文档: 完整的用法可以参考官方文档
-
Writable: 用于声明一个可以在外部组件改变数据的storewritable 有三个方法,分别是
set,update, 和subscribe-
set用于直接设置store的数据import { writable } from 'svelte/store' const test = writable(1); set.set(2); -
update同样是设置store的方法import { writable } from 'svelte/store' const test = writable(1); test.update((n) => n + 1); -
subscribe当数据改变时,会触发订阅的方法import { writable } from 'svelte/store' const test = writable(1, () => { console.log(`this is a subscribe logic.`) }); test.subscribe((n) => { console.log(`subscribe: ${n}`) }) test.update((n) => n + 1);
-
// store.ts
import { writable } from 'svelte/store'

export const testData = writable("Test data")
{$testData}
-
Readable创建一个外部组件不可更改的store -
derived与runes中的$derived类似,传入一个store,并返回一个新的store
import { writable, derived } from 'svelte/store'

export const test = writable(0)

export const testDerived = derived(test, ($test) => {
  return $test * 2
})
readonly传入一个store,返回一个只读的store,但原store不会被改变
import { writable, readonly } from 'svelte/store'

const testWrite = writable("Hello");
const readonlyTest = readonly(testWrite);

testWrite.set("Test Changed"); // success
readonlyTest.set("TestChanged"); // error
get用于获取store的值,也可以用$store代替
import { get, writable } 'svelte/store'

const data = writable(0)

console.log(data) // object

console.log($data) // 0

console.log(get(data)) // 0
生命周期 hooks
svelte组件的生命周期钩子函数只有两部分:创建和销毁。
这是因为svelte认为state的更新与全局组件无关,因此组件的生命周期没有before update和after update的部分
Everything in-between — when certain state is updated — is not related to the component as a whole; only the parts that need to react to the state change are notified. This is because under the hood the smallest unit of change is actually not a component, it’s the (render) effects that the component sets up upon component initialization. Consequently, there’s no such thing as a “before update”/"after update” hook.
onMount组件渲染后调用的钩子函数
onDestory组件在销毁前调用的钩子函数
tick它返回一个Promise,当任何state被改变后触发的resolve,或在下一个微任务触发resolve。tick可以替代afterUpdate钩子函数